This is the multi-page printable view of this section. Click here to print.
Posts
- Level Up Your Prints: Why Line Width is Your 3D Printing Secret Weapon
- 3D Printing and Max Volumetric Speed
- This Week on Minimal 3DP (April 28)
- This Week on Minimal 3DP (April 21)
- Klipper Calibration Website
Level Up Your Prints: Why Line Width is Your 3D Printing Secret Weapon
Level Up Your Prints: Why Line Width is Your 3D Printing Secret Weapon
Hey everyone! In my latest video, I dove deep into a 3D printing setting that often gets overlooked but makes a massive difference in your final prints: line width. For a long time, I was all about chasing faster print times, but I’ve come to realize that optimizing for quality and strength is well worth a few extra minutes – and line width is a key player in achieving just that [00:35].
What I Learned (and You Should Too!):
One of the biggest takeaways for me was just how much line width impacts the strength of your parts. Think about it: wider lines mean more material is laid down and there’s greater overlap between those lines, especially when it comes to printing walls. This significantly reduces those annoying little voids and makes your prints much more structurally sound [01:25], [03:06].
In the video, I specifically explored the line width settings within Orca Slicer. It’s pretty cool how much control you have, with options for the default width, the first layer, outer walls, and even the top surface [01:38].
Through my research (and a bit of trial and error!), I found that for a standard 0.4mm nozzle, bumping up the default line width to around 0.5mm (that’s 125%) seems to be a sweet spot. This aligns with recommendations in the Orca Slicer wiki and what others in the community are finding [05:10].
The best part? I was genuinely surprised at how little impact these adjustments had on the overall print time. The test print I showed in the video only took about 7 seconds longer with the optimized settings [10:06]. That’s a tiny trade-off for a noticeable improvement in quality!
Speaking of quality, I was really happy with how much cleaner the top surface looked after making these changes. You could see a real difference in how those layers blended together, resulting in fewer visible lines [11:22].
Oh, and here’s a little bonus tip I shared in the video: if you’re struggling with removing support material, try using a slightly thinner line width (smaller than your nozzle diameter) for your support structures. It makes them much easier to break away [08:37].
Give it a Shot!
Ultimately, what I wanted to show in this video is that taking the time to dial in your line width settings is well worth the effort. It’s all about finding that balance between print speed, the quality of your finished product, and the overall strength of your 3D prints [12:33].
Check out the full video for a more in-depth look and to see the results for yourself!
Watch the video here: Video Link
Let me know in the comments what line width settings you’ve found work best for you – I’m always learning! What else are you curious about in the world of 3D printing?
3D Printing and Max Volumetric Speed
Finding Your 3D Printer’s Sweet Spot - A Guide to Maximizing Print Speed
Have you ever wondered how fast your 3D printer can truly go? When I get a new printer or see a new model released, the first question that pops into my head is always, “How fast can I print with this thing?”
This post will explore how to determine the optimal print speed for your 3D printer, ensuring both speed and quality.
Factors Influencing Print Speed
Print Parameters
- Infill: While not a major time-saver, adjusting infill patterns and density can slightly reduce print time.
- Wall Thickness: Reducing the number of walls can significantly decrease print time, but it can also compromise the model’s strength.
- Layer Height: Increasing layer height generally speeds up printing, but it can also affect print quality and part strength.
- Other Parameters: Factors like print speed, infill density, and layer height also impact the mechanical properties of the printed part, according to research. Finding the balance between speed and strength is crucial.
Extruder Limitations
- Max Flow Rate: Each extruder has a maximum flow rate, which determines how much filament it can push out per second. Exceeding this limit leads to inconsistent extrusion, poor print quality, and weaker parts.
Determining Max Flow Rate
Ellis’s Print Tuning Guide provides valuable information and equations to calculate your extruder’s max flow rate. A simple test involves extruding a known length of filament at increasing speeds until you observe a noticeable drop in extrusion quality.
One of the key points that Ellis’ guide points out is that using approximate values (Table 1) is possible.
| Hotend | Flow Rate (mm3/s) |
|---|---|
| E3D V6 | 11 |
| E3D V6 Volcano | 20 |
| E3D Revo | 11 |
| Dragon SF | 15 |
| Sailfish | 20 |
| Dragon HF | 24 |
| Dragonfly BMO | 13 |
| Rapido HF | 24 |
| Rapido UHF | 30 |
| Mosquito | 20 |
| Mosquito Magnum | 30 |
| Bambu X1 | 35 |
Finding the Sweet Spot
Determine Max Flow Rate: Conduct tests as described above to find your extruder’s maximum volumetric flow rate. Set Volumetric Speed: Adjust the volumetric speed setting in your slicer software to match your calculated max flow rate. Optimize Print Profiles: Experiment with different print speed settings for various parts of the model, ensuring that the speeds for visible features do not exceed the calculated safe limit. Test and Iterate: Print test parts and adjust parameters based on the results. Observe print quality, part strength, and overall print time.
Important Considerations
-
Model Size: Smaller models may not allow the printer to reach maximum speed due to acceleration and deceleration times.
-
Part Complexity: Complex models with intricate details may require slower print speeds to ensure accurate and high-quality results.
By carefully considering these factors and conducting thorough testing, you can optimize your 3D printer’s print speed while maintaining excellent print quality and part strength.
Disclaimer: This information is for general guidance only. Always refer to your printer’s manual and manufacturer’s recommendations for specific instructions and safety guidelines.
I hope this guide helps you unlock your 3D printer’s full potential!
This Week on Minimal 3DP (April 28)

OrcaSlicer Logo
Photo: SoftFever
The Week of April 28st 2024
I am currently working on several projects this week. They include:
- Voron 2.4 R2 Pro+ Build
- Orca Slicer Seam Settings
- STEM Outreach
Voron 2.4 R2 Pro+ Build
i recordedcan unboxing video on Sunday and I have begun building the Voron this week. I am working myvway through the assembly manual and wiol drop a vireo of rrame assembly next weekend.
Orca Slicer Tutorials
I am working to add to my Orca Slicer tutorials th ok s week. i want to do a post on ideal settings for support (based on a viewer question) and do a video on my recommendation for seam settings.
STEM Outreach
As part of my job, I sometimes do STEM outreach with local schools. This usually involves taking a 3D printer and talking to kids (and parents) about STEM careers. Before I go to an event, I have gotten into the habit of 3D printing a bunch of print-in-place and flexi animals to give out. This week I am hoping to print 100 animals.
This Week on Minimal 3DP (April 21)
Voron Circuit Board Logo
Photo: Team FDM
The Week of April 21st 2024
I am currently working on several projects this week. They include:
- Voron 2.4 R2 Pro+ Build
- Belt Driven Ender 3
- STEM Outreach
Voron 2.4 R2 Pro+ Build
I have started getting together my project website for my Voron build. One of the newer ideas I am trying is to create a project website. I am hoping that it makes it easier for me to save references and other links. I typically try to research a project before I begin and it will make it to asier to share my research.
With the Voron build, I have mostly saved basic references from the Voron site. I have also saved doc from the FormBot site. They appear to have some updated instructions for their kits.
Belt Driven Ender 3
I stumbled across this project a while ago. It seemed like an interesting conversion for my Ender 3 v2. This week I am going to work on adding a project website and printing the needed parts. The hardware cost less than $30 USD.
STEM Outreach
As part of my job, I sometimes do STEM outreach with local schools. This usually involves taking a 3D printer and talking to kids (and parents) about STEM careers. Before I go to an event, I have gotten into the habit of 3D printing a bunch of print-in-place and flexi animals to give out. This week I am hoping to print 100 animals.
Klipper Calibration Website
Klipper Calibration
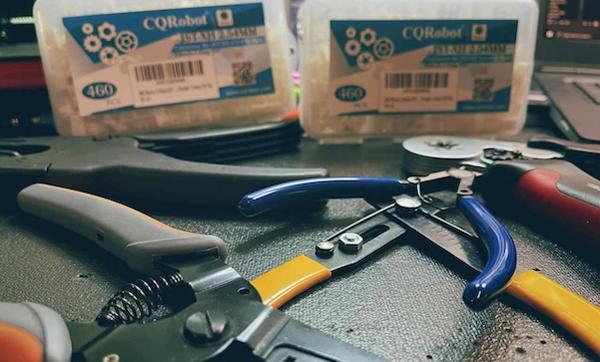
M3DP Tools and Connections
Photo: Mike Wilson / CC-BY-CA
A while ago, I create the my Klipper Calibration Spreadsheet to help myself keep track of and remember various Klipper formulas to tune and improve my 3D prints. I decided to share the tools and i have received lots of requests to share the Spreadsheet. Rather than giving everyone access to edit my original sheet, I have recommended to everyone to “Make a Copy” of the sheet for their personal use. In a lot of cases this has caused some confusion. By making a copy, there is no way to any edits or updates I do to the tools.
Because of this (and my desire to do a little programming), I have put together the Klipper Calibration Website. The standalone site gives me an opportunity to create some useful tools and program. It also give me a way to create more detailed documentation and video links.
Another hope is that, because I am using Docsy, I can use the tie-ins with GitHub to allow the community to comment, make suggestions, and give feedback. I could than further refine the tools. It is my hope that this site will continue to evolve over time and include additional tools.